hardware
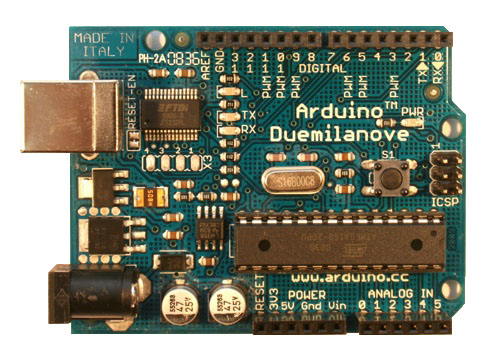
arduino duemilanove

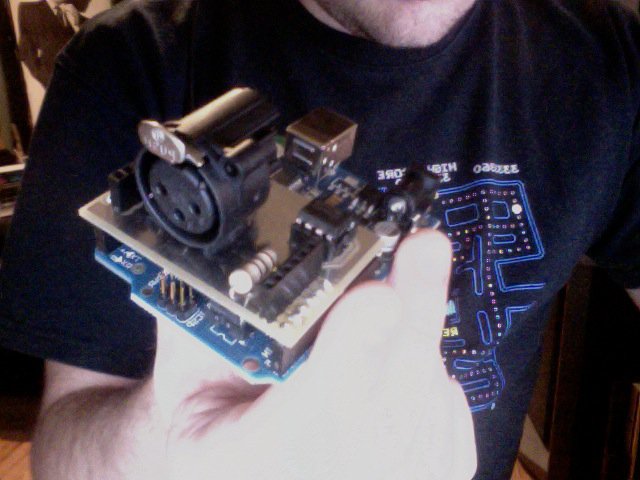
dmx shield

information on the dmx shield can be found here
cauvet colorSTRIP

DMX light used in installation
software
touch OSC layout
This layout is designed to work in conjuncture with below arduino code and Max/msp patch. It sends data via OSC to the host computer to be translated into DMX via Max and Arduino
Download the layout here
arduino code
Firmware for the arduino was written which allows for serial data to be received from base laptop as well as DMX messages to be sent out.
The source code for this project can be found on github
The DmxSimple library was utilized for outputting DMX data to the lighting fixture, the library can be found here
max/msp code
A Max/msp patch was used take incoming OSC data, and route it to the arduino via Serial. The code also kept track of which mode the user was inputting data to allow full control of lighting rig.
This patch can be found in the source code linked above
The Final Product
The final installation was eye level in height and 6 feet in length.
There were four major components to the installation.
The Frame and the Motors. (The frame was designed by fellow OCAD students Paul Moleiro and Dov Smilovic.)
The Arduino Duemilanove w/ DMX shield
Chauvet ColorSTRIP dmx light
iPod touch /w Touch OSC
The way the installation worked was actually fairly simple. An iPod with touch osc installed would send OSC message over a wireless network to a macbook pro. This macbook would have a max/msp patch installed which would route the data from the iPod and translate the messages to be sent via serial to an arduino micro-controller. The arduino would then take these serial messages and use the information to control the lighting via DMX and the speed of the string via PWM.
inspiration

The original toy that inspired it all
initial Hardware Hacking
I don't know if anyone on the board has had the pleasure of playing with a stringin’ It… but it is an absolutely fantastic toy to create 3D light shows in front of you.
The initial prototype was made on a small scale by hacking the original toy to be controlled with an arduino. A monome controller was used as a control interface emulating the controls of the original toy.
Later the lights were controlled using an audio stream from ableton live, allowing for real time audio reactive 3D visuals.
Since the majority of the original toy was discarded aside from the enclosure you can actually rebuild this project from the bill of materials and instructions below.
materials
- 1 x arduino Duemilanova
- 2 x 5v DC motor
- 1 x String
- 2 x Red LED
- 2 x Blue LED
- 2 x Green LED
- 3 x 2N3904 Transistor
- 1 x TIP120 Transistor
- Some Wire
instructions
Each LED is wired in series with the other LED of the same color. All three groups receive power from pin 10. The group of each group goes to a collecter on the 2N3904. Pins 6 - 8 go to the respective bases, and the emiters all conenct to ground.
